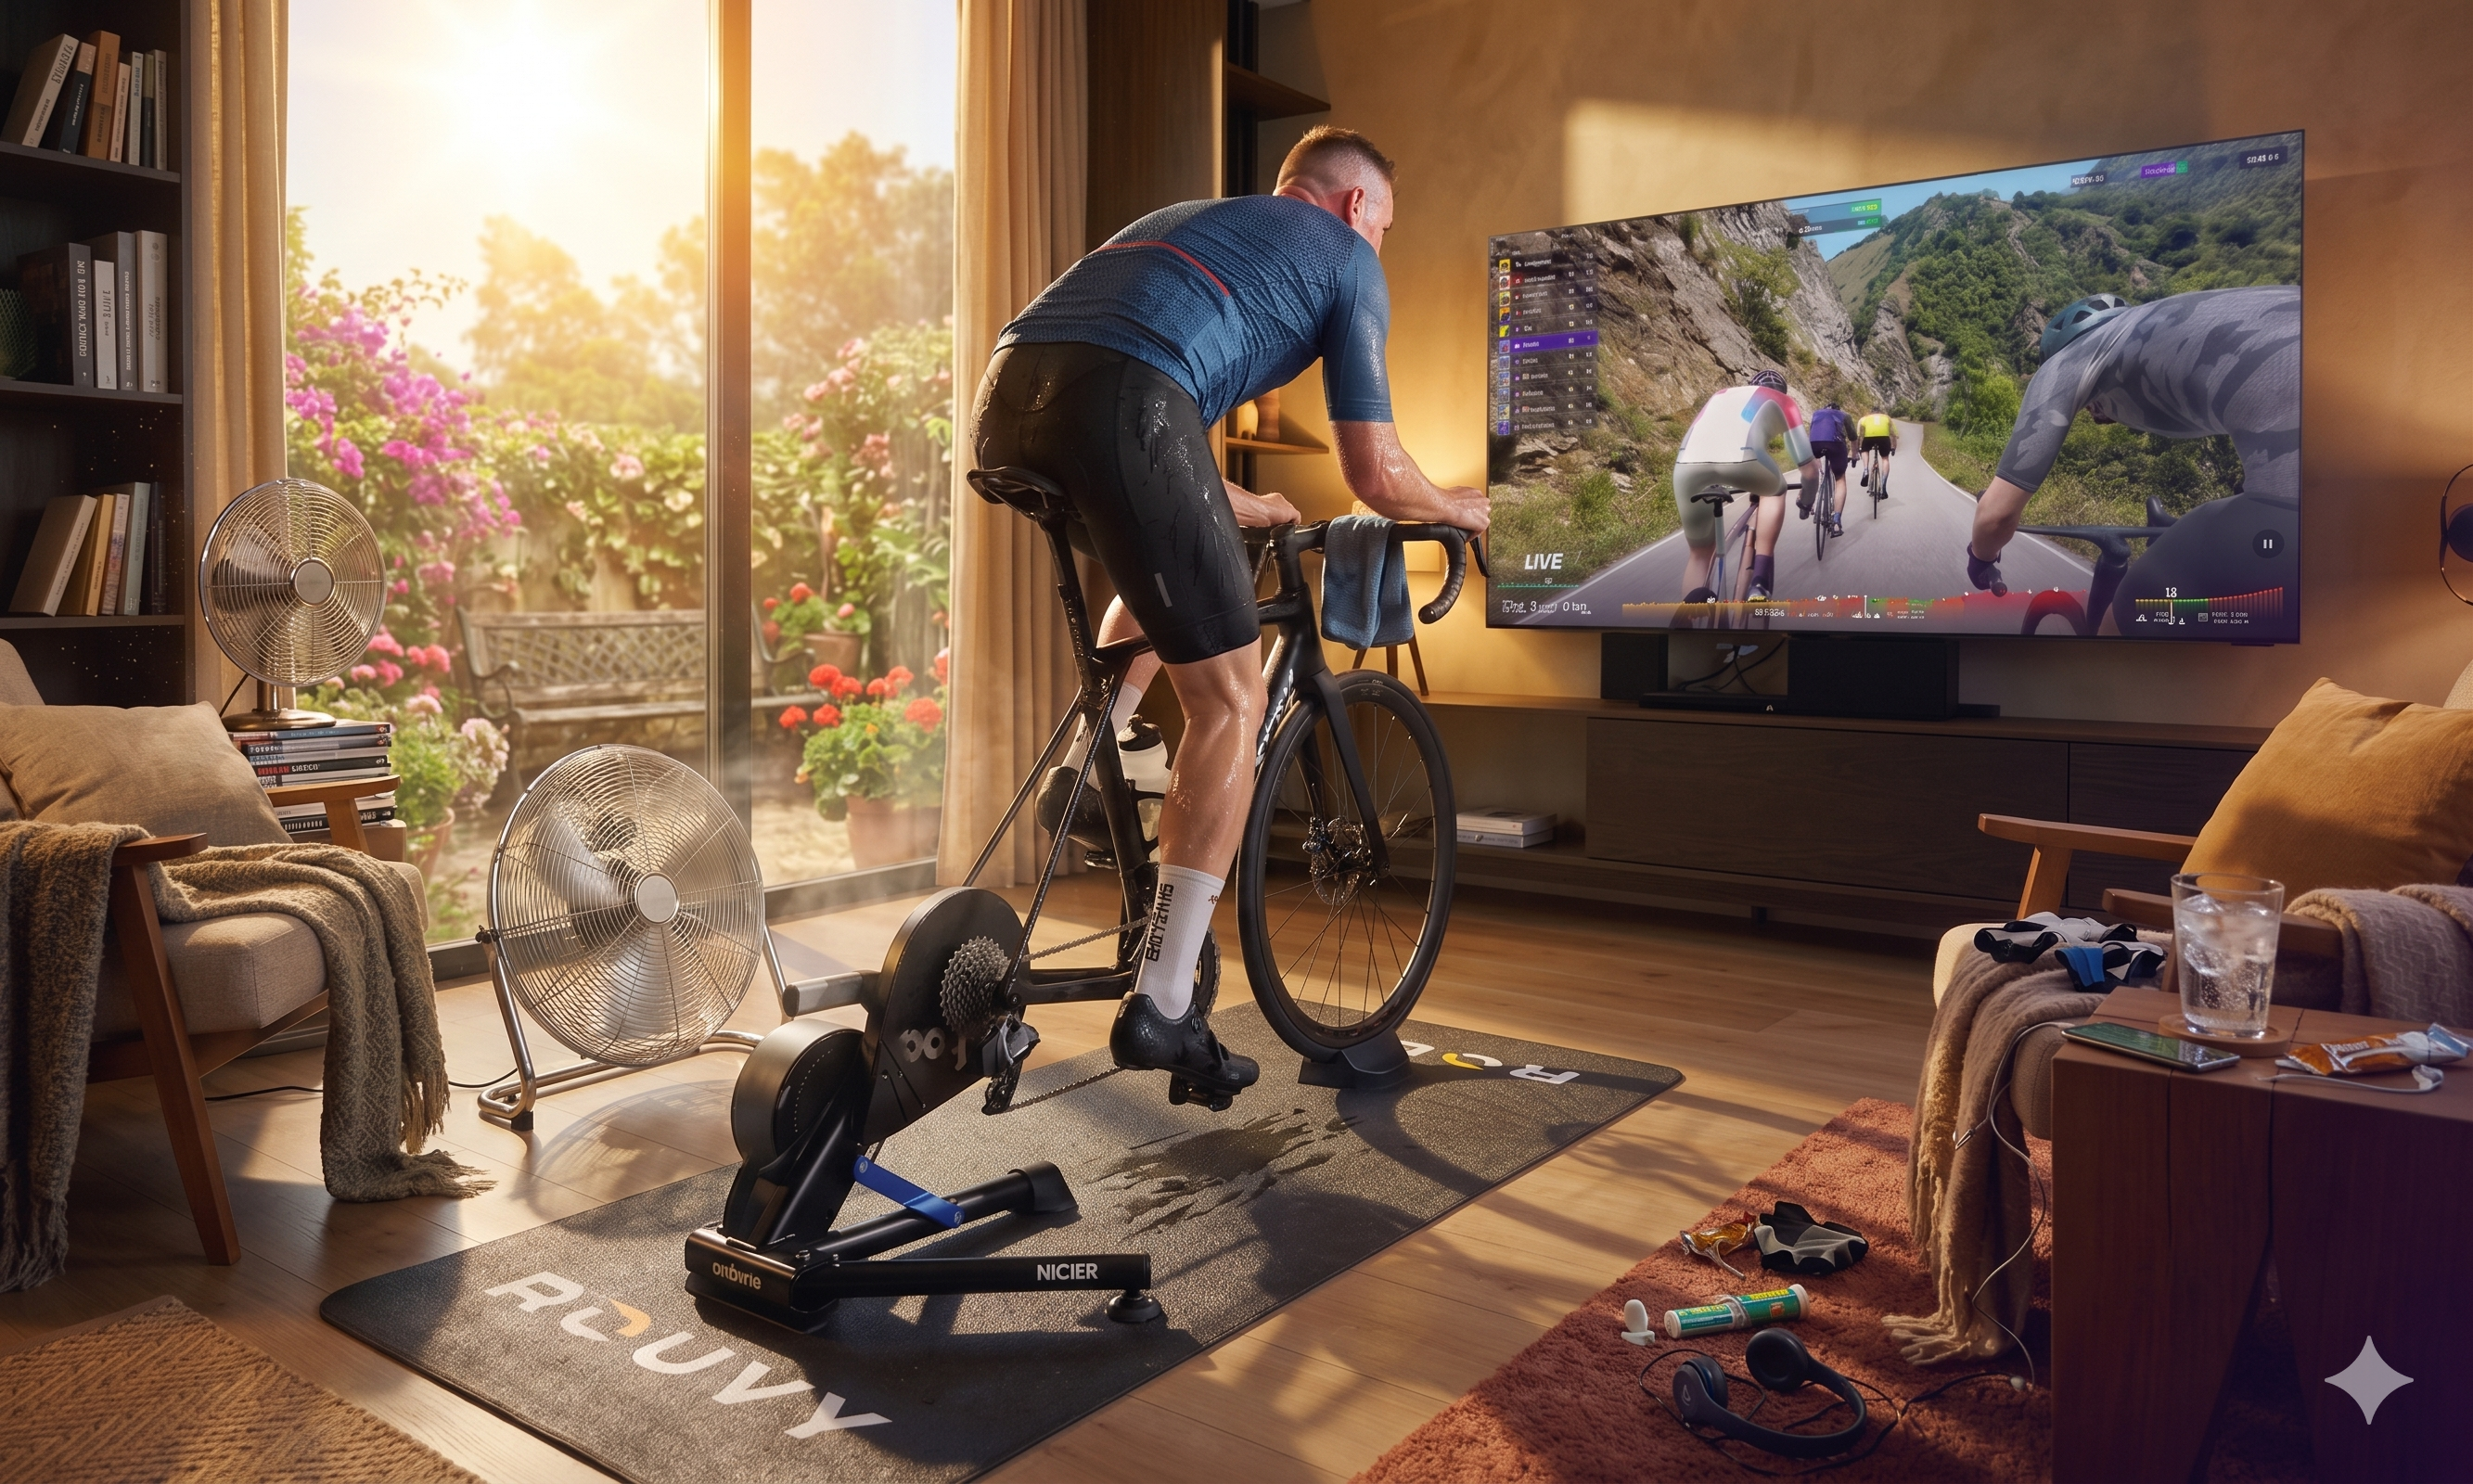
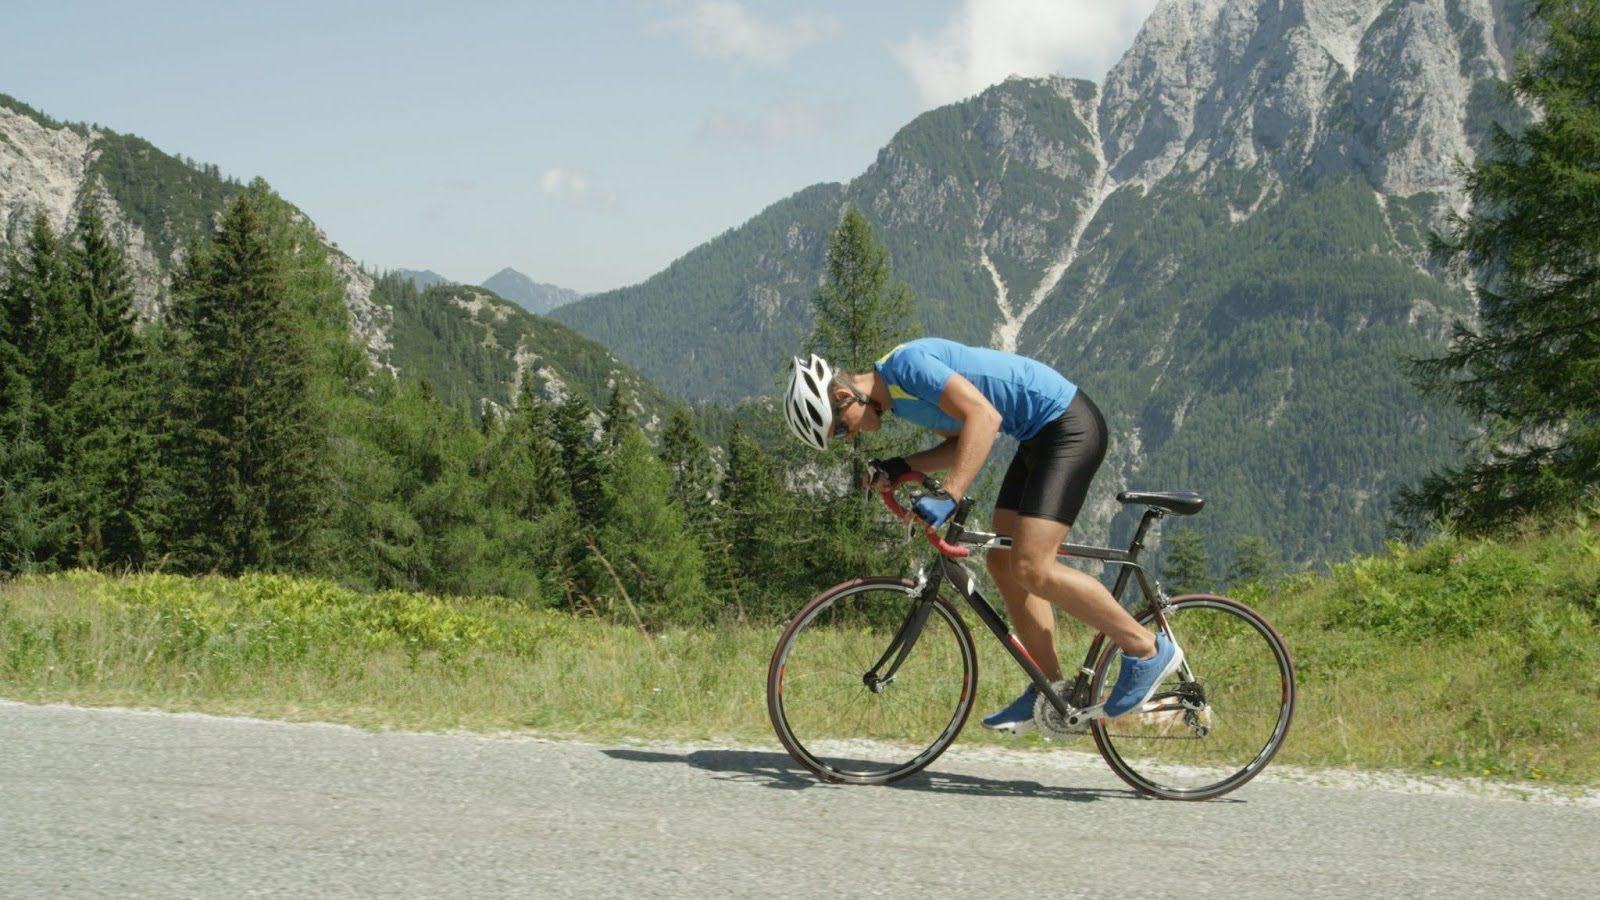
Once you’ve captured a great ride using your GoPro and nailed all the recording fundamentals, it’s time to bring your virtual cycling route to life in the ROUVY Route Creator. This innovative app is where the magic happens - turning the raw video footage into a virtual route that you can enjoy whenever you want. By enhancing it with high-definition overlays and 3D models, you can create an immersive cycling experience for you and other cyclists around the world. It's also ideal for training for an event in advance.
There’s a dedicated support page that comprehensively covers the technical details and step-by-step stages of how to upload and process your video to create a finished virtual route. We strongly recommend reading the Support Page article first so that you have an understanding of the process. This article focuses on practical advice for creating the route. We’ve collected years of knowledge from the ROUVY Route Creator tech team to share with you here so that you can create routes of the highest quality.
We’ll walk you through expert tips on lane definition, 3D object placement, lighting, visibility, the height profile and more- all the essential ingredients that elevate your route from good to great.

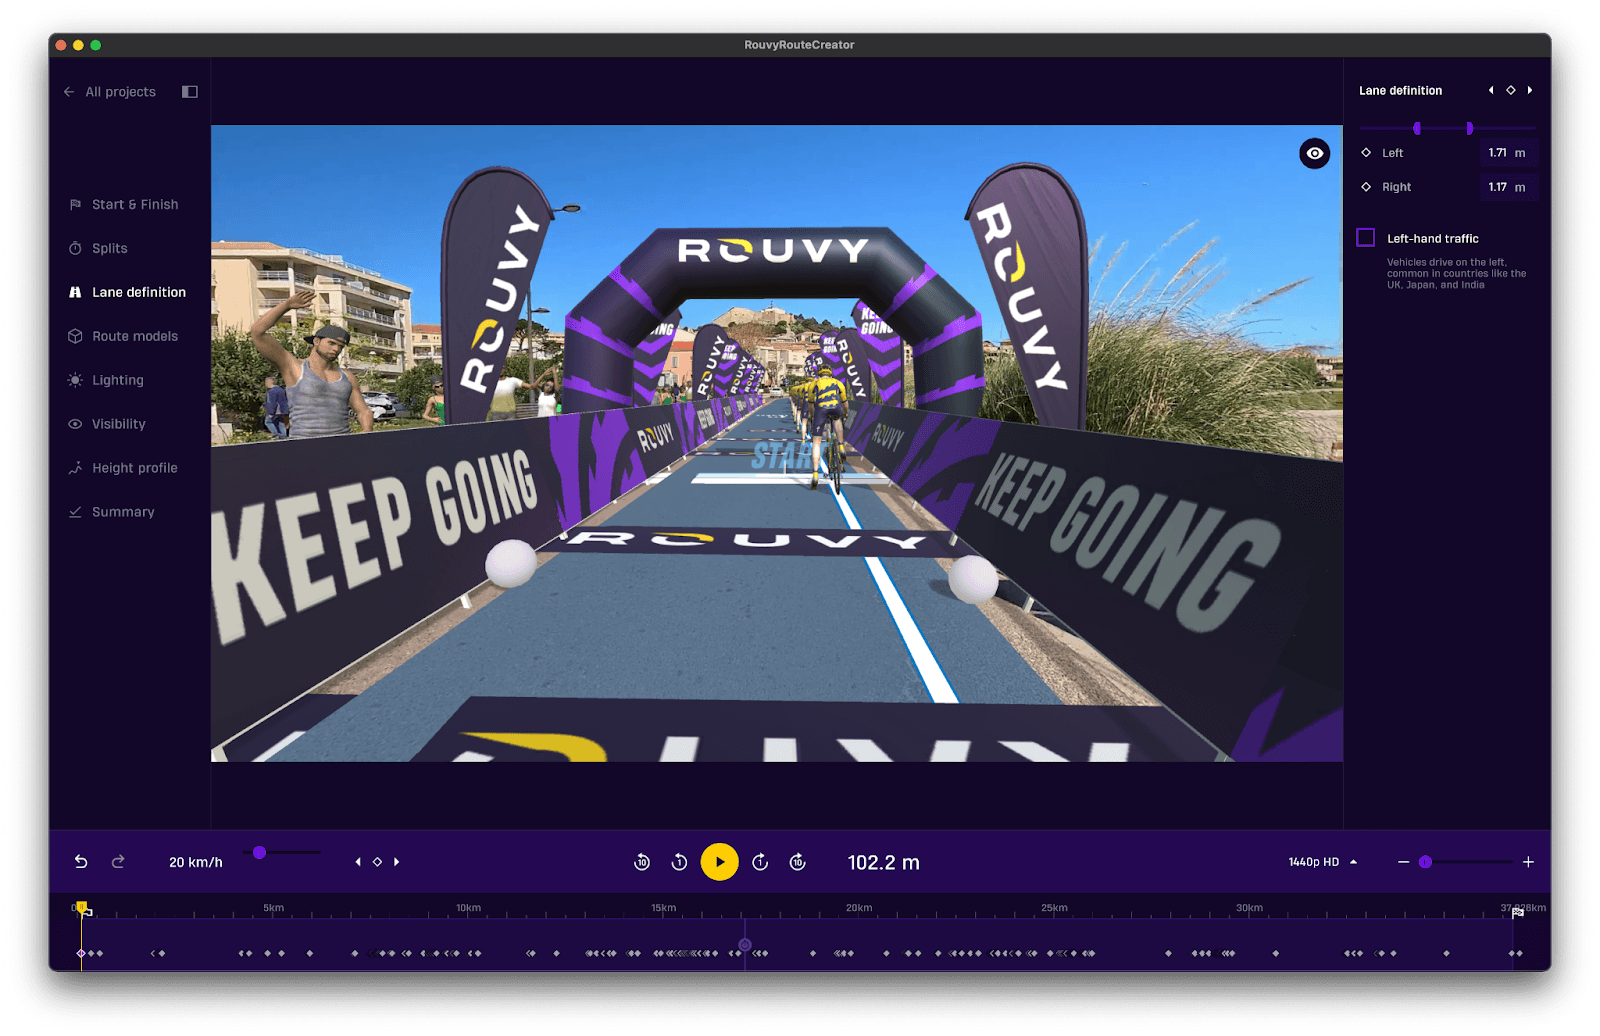
1. Lane definition & width placement: Set the stage for realism
Think of lane definition as the invisible guide for the area where your avatar rides - and how a fellow rider's screen avatar interacts within the defined lanes, allowing several riders to comfortably ride side-by-side. Done right, it enhances the level of realism and keeps virtual cyclists aligned with the road.
Pro Tips for Lane Setup
Start early: Set your first lane definition at least 50m before the Start line.
Optimal width: Aim for an ideal lane width of 3+ metres (with some space to the left and right of the camera) to comfortably accommodate multiple riders without visual clipping at the edges. The minimum for two riders is 1.5m.
Keep it smooth: Use as few keyframes as possible. Avoid abrupt width changes - instead, make them gradual across a 50–100m stretch of road.
When modifying lane width, consider placing an additional keyframe approximately 50m before your intended adjustment point. This preserves previous lane settings and prevents unintended interactions with objects. It's important to always remember that any setup gradually changes from one keyframe to the next one, so your new setting can have an effect over long distances.
Get the balance right: If you want a multi-cyclist peloton to ride on your route, you'll want the cycle lane to cover the entire road. However, you won't want riders to 'disappear' through oncoming cars so the lane should be manually reduced for sections where there are cars or other objects in the oncoming side of the road.
Adjust with precision: In 3D view, use the left/right mouse buttons to tweak widths. Alternatively, use the sliders in the toolbox.
Remember that in some countries like the UK and Australia, riders drive/cycle on the left. If you need to change the riding side in a given country, do it before you start.
Why it matters: Lane definition directly influences how 3D objects like banners and signs are placed along the route. In the 3D window settings, turn off video and see how line-width changes directly affect/flatten the 3D road surface.
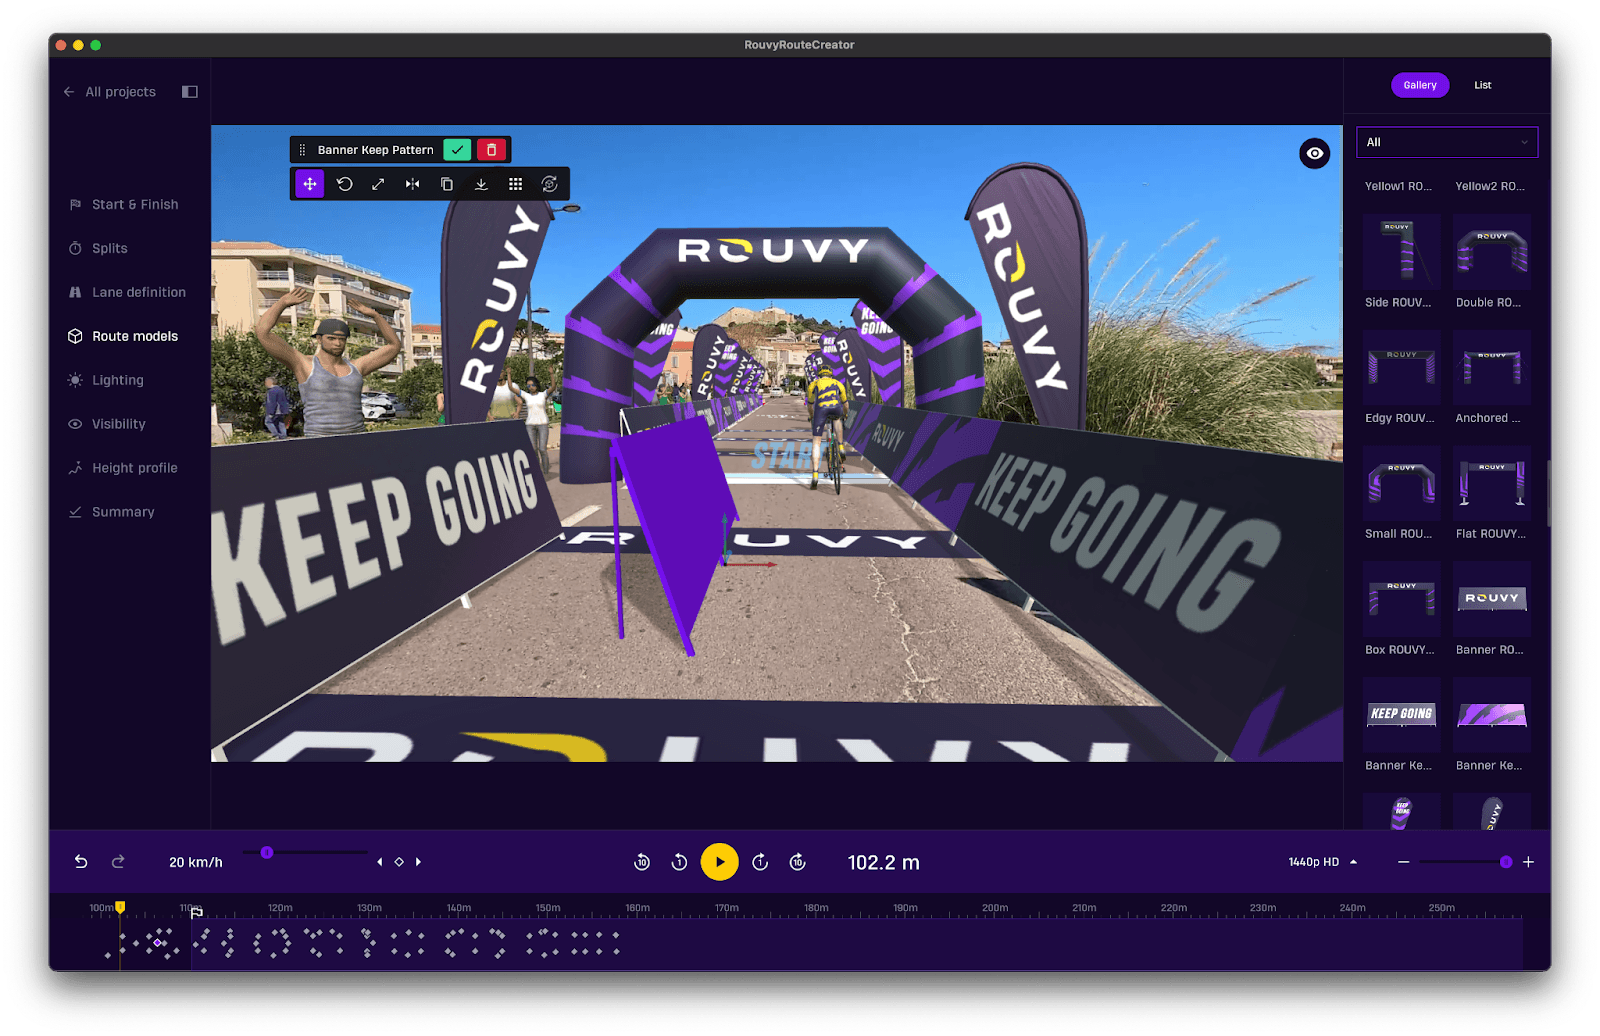
2. 3D Objects: Bringing your augmented reality routes to life
3D models, from start gates to roadside banners, can turn a video into a rideable cycling world. These aren’t just visual fluff; they can guide, inform, and immerse riders in your virtual environment.
Where and What to Place
Mandatory: Place models at the Start and Finish.
Optional: Add split points, barriers, direction signs, gates, fans, or customized elements for added visual flair.
Pro tips for model placement
Zoom into the timeline for exact placement (scroll + drag with the mouse wheel).
Start with banners, then add larger objects like arches or gates afterward to ensure correct alignment.
Always use "Make a copy" when placing banners. Place only the first one in the row and copy the others.
Quickly select multiple objects on the timeline by clicking and dragging over the area. (or hold shift + left mouse button on the 3D view)
Entire groups of models, such as arches at split points, can be duplicated and repositioned as complete sets along the route.
Height check: Avoid creating floating or buried road signs. Adjust vertical placement manually by holding the left mouse button when placing them. When placing the stickers, hold down the mouse button and move the mouse to instantly adjust the height above the surface.
Duplicate smarter: Use Snap on Terrain and Align tools to neatly duplicate and reposition groups of objects.
Ensure realistic reactions: Make sure that added 3D objects react to their environment in the same way as they would in the real world, such as shadows and responsiveness to cyclists.
Bonus tip: Ensure Visibility settings are sufficiently long (recommended at least 200m) before placing Route Models. Short visibility distances can cause abrupt object appearances as riders approach.
3. Lighting: Match the mood of the indoor cycling experience
Lighting is a subtle thing, but it’s what blends your 3D objects with the real-world video using the covering model. Done right, it’s invisible. Done wrong, and riders will constantly feel like they’re in a video game.
Essential lighting settings
Direction: Match the shadow direction in your video.
Intensity: Adjust based on conditions - lower for cloudy days, higher for bright sun.
Shadow Strength: This helps avatars feel grounded. Weak shadows can make them look like they’re floating.
Color Temp: 6000K for midday, 2700K for sunrise/sunset
How to apply lighting effectively
Use a reference object near the Start with a real shadow and adjust the light direction, length and intensity accordingly.
Shift settings slightly ahead of Start for a natural transition.
First, quickly go through the route and set only the “Main light” changes in long sections (cloud vs. sun sections)
Then go into the details and set short, quick changes in the light with "Shadows" (Individual trees, houses, tunnels)
Pro Tip: The angle of the light is usually only needed at the start and end. ROUVY Route Creator interpolates the values between them automatically, so spend a little time getting these absolutely right.

4. Visibility: as far as possible
Setting visibility ahead helps you control how far riders can “see” in the virtual world. This is useful for hiding real-world elements (like a car that drove into frame), fixing glitches, or improving immersion.
Smart visibility strategy
Start long: Set a long visibility range (at least 200m, maximum if possible) at the beginning.
Reduce only when needed: Use it, for example, to cover a vehicle that enters the frame, or avoid clipping or see-through 3D objects (e.g., trees, fences) when going round bends or sharp corners. You can also use it to remove a vehicle that you've been stuck behind while filming.
Fixing issues: If avatars appear through real objects or corners look strange, lower the visibility in those areas.
Pro Tip: Like lighting, visibility smoothly transitions between keyframes. Place a keyframe just before changes to preserve earlier settings.

5. Height Profile: Feel the road
The height profile influences how your ride feels on a smart trainer - especially on the climbs and descents, by incorporating accurate gradients that ensure realistic elevation changes.
Height Editing Tips
Use Google Elevation Map (Display profiles/”MAP”) as a reference only (it's not always 100% accurate).
If you notice unrealistic spikes or flat stretches, mark sections on the timeline and edit manually.
Don’t stress it - edits can always be undone or reset.
Experiment until the profile matches your expectations for realism.
Advanced Tips: If the visual terrain doesn’t match the feel on a trainer, this is your go-to adjustment. Try a double click at any point on the height profile.

6. Naming, Descriptions & Final Touches
Once you’re satisfied with the visuals and physics of your route, it’s time to prepare the finished route for discovery.
Route Naming
Follow ROUVY’s naming format:- [Route Name] | [Country]
For detailed locations: [Place] | [Region] | [Country]
In case the route cannot be named according to the above criteria, we will determine the name according to where the route starts and ends: [Place] to [Place] | [Country]
For iconic climbs: Alpe d’Huez | France
For events: IRONMAN 70.3 St. George
Ensure the names create recognisable routes within the cycling community, maximizing the appeal and familiarity of the routes.
Descriptions
Keep the length of the Description to a maximum of 360 characters. The first 120 chars are visible on the route detail at first glance, the rest is visible after clicking on the View More button.
Avoid mentioning exact data such as total elevation gain, as this can vary.
Thumbnail Image
Use the best photo or video frame from your video
Logos, captions, or overlays are not allowed.
7. Shortcuts & power tips for power users
Zoom timeline: Mouse wheel
Jump to keyframe: Double-click
Navigate quickly: Small arrows in the timeline
Copy/paste keyframes or objects: Ctrl+C / Ctrl+V (Cmd on Mac)
For faster work without buffering: In the project list, download the video (540p)
Fast editing mode: Turn OFF video for unlimited movement speed
Undo anytime: Edits are fully reversible
Before you submit: Final checklist
✅ Lane definitions are set and smoothed
✅ Start, Finish, and optional Split lines placed on wide, level stretches
✅ 3D objects are placed and aligned—no floating signs!
✅ Lighting matches shadows and changes naturally
✅ Visibility tweaks fix real-world conflicts
✅ Height profile reviewed and edited
✅ Route is named, described, and has a clean thumbnail
✅ Customizing routes with banners and branded inflatables for an immersive experience
You’re ready to hit “Try in Ride” and experience your route!
Now go out into the world and create!
Creating a route in ROUVY Route Creator is about enhancing the indoor cycling experience for yourself and other cyclists around the world. It's a great way to share a route with friends or your cycling club. It's also ideal for training for an event in advance.
The best routes combine technical precision, thoughtful design, and creative flair.
Don’t be afraid to experiment and make tweaks. You can revise and re-upload your route as many times as you like. With practice, your routes will become legendary among the global ROUVY community!